Using a gamepad
You can, and should, use a gamepad to control your RC. It's much easier to generate good training data using a gamepad, and it's much easier to drive the thing compared to the Web interface that Donkey provides.
So how do we connect and use one?
Compatible controllers
First, let's make sure you have one that'll actually work
The official Donkey docs list that the following are known to work:
- Logitech Gamepad F710
- Sony PS3 Dualshock OEM
- Sony PS3 Sixaxis OEM (Not compatible with Jetson Nano)
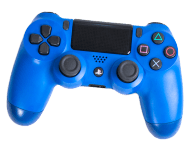
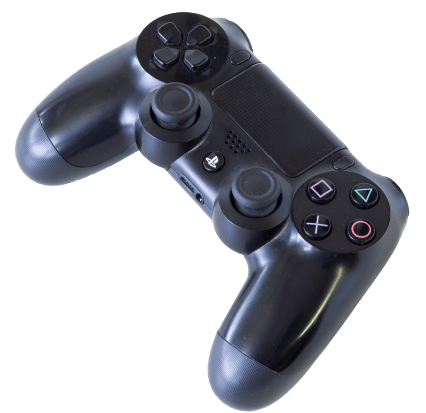
- Sony PS4 Dualshock OEM
- WiiU Pro
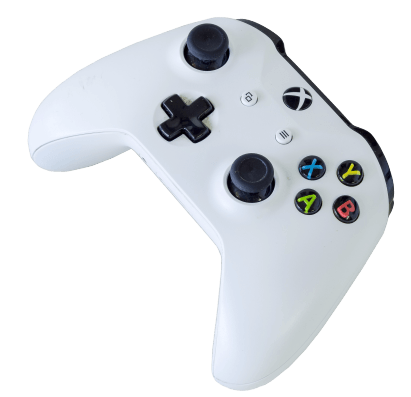
- XBox Controller
- SteelSeries Nimbus (works only on TX2 jetpack 4.2+, may work on the Nano)
Depending on the controller you're going to use, open up the myconfig.py file and find the # JOYSTICK section and uncomment and fill the following (using one of the types suggested inline with the setting):
CONTROLLER_TYPE='xbox' #(ps3|ps4|xbox|nimbus|wiiu|F710|rc3)
If your gamepad isn't officially supported, try following the rest of the tutorial and connecting it to the Nano. If it shows up as /dev/input/js0, you should be able to use it, since the Donkey platform just uses that OS device mount as the gamepad.
Connecting your controller
Xbox (One) Controller
The Xbox controller doesn't like the Enhanced Re-Transmission Mode, so we'll disable it first.
Open up the /etc/modprobe.d/xbox_bt.conf file (this may actually create the file if it doesn't exist yet):
sudo nano /etc/modprobe.d/xbox_bt.conf
# Add this line and save the file
options bluetooth disable_ertm=1
# Reboot
sudo reboot
After rebooting, check it's actually disabled by running:
cat /sys/module/bluetooth/parameters/disable_ertm
It should say ‘Y'. If it does, open up bluetoothctl:
sudo bluetoothctl
# Register the default agent
agent on
# Default agent request
default-agent
# Scan for devices
scan on
Turn on your Xbox controller (by pressing the big Xbox logo button) and start the pairing mode by pressing the sync button on the back of the controller, next to the microUSB port.
You should see your controller show up in bluetoothctl similar to:
[NEW] Device YO:UR:MA:CA:DD:RS XBox One Wireless Controller
Type in:
# This may take a few tries ...
connect YOUR_MAC_ADDRESS
# If it connects but immediately disconnects, the disable_ertm setting isn't properly set up, try doing that again
# When it connects and the big Xbox logo button is solid white:
trust YOUR_MAC_ADDRESS
quit
Once connected, it should automatically reconnect anytime the Jetson and it are both powered on. If it doesn't, you'll have to run the steps above again.
PS4 Controller
Install ds4drv:
sudo pip install ds4drv
Grant it permissions:
sudo wget https://raw.githubusercontent.com/chrippa/ds4drv/master/udev/50-ds4drv.rules -O /etc/udev/rules.d/50-ds4drv.rules
sudo udevadm control --reload-rules
sudo udevadm trigger
sudo reboot
After rebooting run ds4drv:
# --led changes the light bar color, you can modify it or not use it at all
# --hidraw doesn't play well with some controllers, if you're having issues, try not using it
ds4drv --hidraw --led 00ff00
Start the controller in pairing mode:
- Press and hold Share button
- Press and hold PS button until the light bar starts blinking
- If it goes green after a few seconds, pairing is successful.
To run ds4drv on boot, open up /etc/rc.local and paste in the command you used to start ds4drv:
sudo nano /etc/rc.local
# Paste in (with or without --hidraw and --led):
/home/YOUR-USERNAME/env/bin/ds4drv --led 00ff00
PS3 Controller
The Donkey docs say to follow this guide, or you can just run:
sudo apt-get install bluetooth libbluetooth3 libusb-dev
sudo systemctl enable bluetooth.service
sudo usermod -G bluetooth -a pi
sudo reboot
After rebooting, plug in the controller with an USB cable, press the PS button and:
wget http://www.pabr.org/sixlinux/sixpair.c
gcc -o sixpair sixpair.c -lusb
sudo ./sixpair
Run bluetoothctl as a super user and pair your controller:
sudo bluetoothctl
# Enable the default agent
agent on
# List all found devices and get your controller's MAC address
devices
# Trust your controller
trust <MAC ADDRESS>
# Default agent request
default-agent
# Quit
quit
Unplug the USB cable and press the PS button. Your controller should be mounted at ls /dev/input/js0.
Any other gamepad/joystick/controller
If it's a Bluetooth one, try pairing it via bluetoothctl and see if it mounts at /dev/input/js0. If it does, great, you can move on.
If not, try connecting it via USB and see if it mounts at /dev/input/js0, if it does, you're good.
If neither goes, try searching how to connect that particular controller to a Linux device online, if there's a way (mostly there is), it should mount at the above mentioned js0 and you should be able to follow along.
Creating a Button/Axis mapping:
After your controller is connected, run:
donkey createjs
The output should be:
##~~~~~~~~~~~~~~~~~~~~~~~~~~~~~~~~~~~~~##
## Welcome to Joystick Creator Wizard. ##
##~~~~~~~~~~~~~~~~~~~~~~~~~~~~~~~~~~~~~##
This will generate code to use your joystick with a Donkey car.

Overview:

First we name each button, then each axis control.
Next we map names to actions.
Finally we output a python file you can use in your project.

Hit Enter to continue

# After pressing Enter
Please plug-in your controller via USB or bluetooth. Make sure status lights are on and device is mapped.
Enter to continue
# You can press enter since we've already gone through connecting your controller

Where can we find the device file for your joystick?
Hit Enter for default: /dev/input/js0 or type alternate path:
# Should be /dev/input/js0 if it's a PS3/PS4/Xbox/Standard USB one
# Hit enter and see if it finds it (it will if its on /dev/input/js0)

Attempting to open device at that file...
Opening /dev/input/js0...
Device name: The type of Controller you're using
Found and accessed input device.
# After pressing Enter

Next we are going to look for gyroscope data.
For 5 seconds, move controller and rotate on each axis. Hit Enter then start moving:
# You can skip this, since you most probably won't be using it

Ok, we didn't see any events. So perhaps your controller doesn't emit gyroscope data. No problem.
Finally, you'll get to this part:
We will display the current progress in this set of tables:

Button Map:
+-------------+-------------+
| button code | button name |
+-------------+-------------+
+-------------+-------------+
Axis Map:
+-----------+-----------+
| axis code | axis name |
+-----------+-----------+
+-----------+-----------+
Control Map:
+---------+--------+
| control | action |
+---------+--------+
+---------+--------+

As you name buttons and map them to controls this table will be updated.
While in here, you should go through pressing every button on your controller, and giving it a name.
Note: during this first step, you can only map buttons, the axes, such as triggers or analog sticks will come next.
For my Xbox One Controller, I made the following button map:
Button Map:
+-------------+-------------+
| button code | button name |
+-------------+-------------+
|    0x130    |      A      |
|    0x131    |      B      |
|    0x133    |      Y      |
|    0x132    |      X      |
|    0x137    |    Start    |
|    0x136    |    Select   |
|    0x135    |      R1     |
|    0x134    |      L1     |
|    0x139    |      RS     |
|    0x138    |      LS     |
+-------------+-------------+
After mapping all the buttons, wait for 10 seconds and enter Y when the program asks you if you've finished mapping all the buttons.
This is what my axis map looks like:
Axis Map:
+-----------+-------------------------+
| axis code |        axis name        |
+-----------+-------------------------+
|    0x5    |            RT           |
|    0x2    |            LT           |
|    0x0    |  Left Stick: Horizontal |
|    0x1    |   Left Stick: Vertical  |
|    0x4    |  Right Stick: Vertical  |
|    0x3    | Right Stick: Horizontal |
+-----------+-------------------------+
You can enter D when you're done and move on to the control map, through which we'll map buttons and axes to specific car controls.
This is what my control map looks like:
Control Map:
+------------------------+--------------------------+
|        control         |          action          |
+------------------------+--------------------------+
|         Start          |       toggle_mode        |
|         Select         |   erase_last_N_records   |
|           A            |      emergency_stop      |
|           R1           |  increase_max_throttle   |
|           L1           |  decrease_max_throttle   |
|           B            | toggle_constant_throttle |
|           X            | toggle_manual_recording  |
| Left Stick: Horizontal |       set_steering       |
| Right Stick: Vertical  |       set_throttle       |
+------------------------+--------------------------+
If you've messed something up, don't worry, at the next menu you can go back to any step you'd like:
Now we are nearly done! Are you happy with this config or would you like to revisit a topic?
H)appy, please continue to write out python file.
B)uttons need renaming.
A)xes need renaming.
T)hrottle and steering need remap.
R)emap buttons to controls.
If you're happy with your maps, enter H and it will prompt you for a name under which to save your mapping. The default one is my_joystick.py, but you can enter a custom one, if you're planning to use multiple different controllers, or just for non-generic-naming's sake:
Now we will write these values to a new python file.
What is the name of python file to create joystick code? [default: my_joystick.py] xbox_one_controller.py
It will then ask what to name the custom Python class of the controller you've just created:
What is the name of joystick class? [default: MyJoystick] XboxOneController
xbox_one_controller.py written.
Check your new python file to see the controller implementation. Import this in manage.py and use for control.
Almost there, we just need to import our custom mapping in the manage.py script to be able to use it with our RC.
Open up manage.py (nano or vim) and at the end of the imports, find the following line:
from donkeycar.parts.controller import get_js_controller

ctr = get_js_controller(cfg)
And replace it with:
# This assumes you haven't changed the default names
from my_joystick import MyJoystick

ctr = MyJoystick(throttle_dir=cfg.JOYSTICK_THROTTLE_DIR,
                                throttle_scale=cfg.JOYSTICK_MAX_THROTTLE,
                                steering_scale=cfg.JOYSTICK_STEERING_SCALE,
                                auto_record_on_throttle=cfg.AUTO_RECORD_ON_THROTTLE)

ctr.set_deadzone(cfg.JOYSTICK_DEADZONE)
Or if you've defined a custom name for the python file containing your mapping, and the class it contains, which I did, then modify the import line so it uses your custom script and class name:
# In my case
from xbox_one_controller import XboxOneController

ctr = XboxOneController(throttle_dir=cfg.JOYSTICK_THROTTLE_DIR,
                                throttle_scale=cfg.JOYSTICK_MAX_THROTTLE,
                                steering_scale=cfg.JOYSTICK_STEERING_SCALE,
                                auto_record_on_throttle=cfg.AUTO_RECORD_ON_THROTTLE)

ctr.set_deadzone(cfg.JOYSTICK_DEADZONE)
And you're done! Now we can start actually driving the car using our controller!