Using a custom domain
It's very easy to use a custom domain with both GitHub Pages and Netlify.
First, you need a custom domain. You can buy it from wherever you'd like, I'll assume you're using Namecheap.
-
Go to Namecheap domain search, find a domain you like and buy it.
-
Go to your hosting provider:
- GitHub: Go to your repository, open up Settings, scroll down to the GitHub pages section and enter your domain.
- Netlify: Go to your website, open up Domain settings and add your domain as a custom domain. After adding the domain, click on the options dropdown (three dots) to the right of the domain you've just added and select Set Up Netlify DNS. Click on until you get to the screen that says Update your domain's nameservers. Copy the list of the nameservers somewhere.
- Tip: Always add your domain to Netlify or GitHub pages first. Configuring the domain with your DNS provider without adding it to the hosting provider first could result in someone else being able to host a site on one of your subdomains.
-
Go to your Namecheap domain list and select manage:

-
Netlify: Scroll down to the Nameservers section, change it to Custom DNS, enter the list of the nameservers you've copied and press the green check mark and you're done:

-
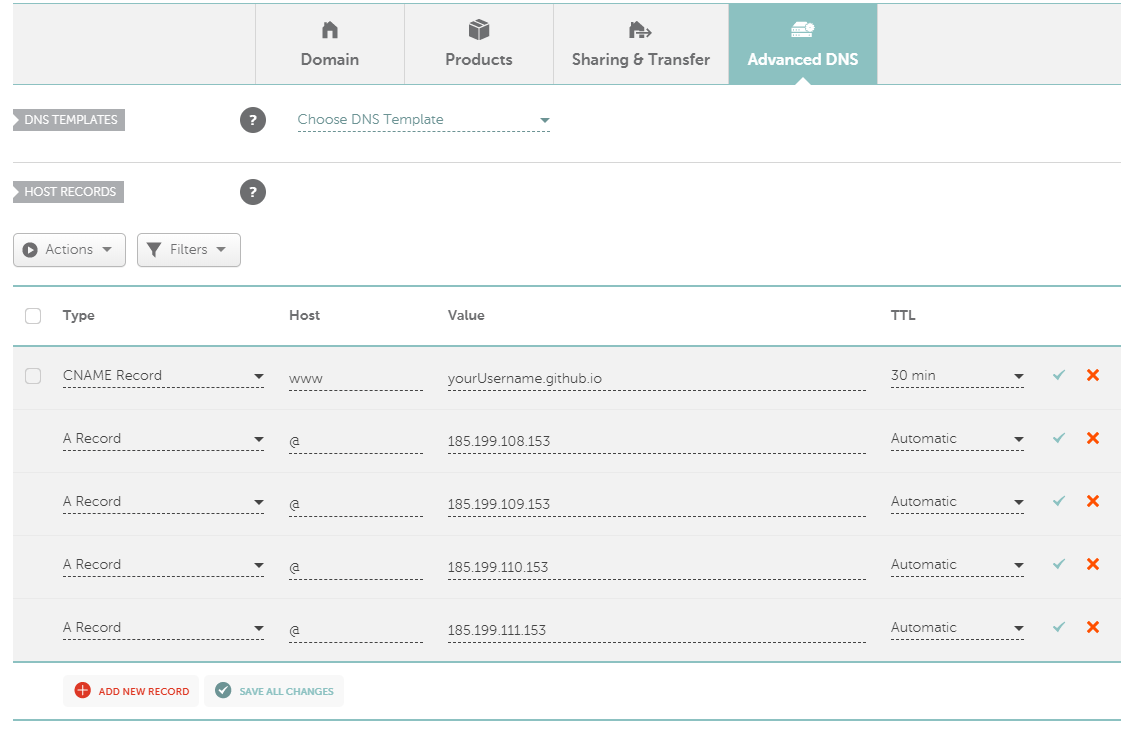
GitHub: Open the Advanced DNS tab in the upper right corner, delete all of the records from the Host records and add the following:
- CNAME Record - www -
yourUsername.github.io - A record - @ - 185.199.108.153
- A record - @ - 185.199.109.153
- A record - @ - 185.199.110.153
- A record - @ - 185.199.111.153

- CNAME Record - www -
And you're done. It takes some time for the changes (DNS) to propagate, but you should be able to access your site through your new custom domain in a couple minutes to about a half an hour!